Locations
A location is a setting seen from every side: a 3/4 view, the cardinal directions and a top view. They are assembled into a 3D room where you can find any angle, and variants show the same place at another time of day and in other weather.
On this page
- What you will get
- How the Locations section works
- Create a location with the agent
- Ask the assistant
- Or create one manually
- Check the profile
- Generate the 3/4 view
- Generate the cardinal directions and top view
- Fix a detail with an outline
- View the location in 3D
- Add a variant (time / weather)
- Second variant: winter
- Pick the location in a shot
- What’s next
What you will get#
- Profile
- 3/4 view
- North
- Top view
- West and east
- South
- Correction
- 3D room
- Variants
- Needs
- A project with a script
- Section
- Locations
- Generations
- Location views, correction, two variants
How the Locations section works#
- Left — the project menu. “Locations” sits in the “Assets” group.
- Top — the project’s locations. A strip of previews; the top bar has Add location.
- Center — the location card. The name with the EXT or INT type, the mood, references and the view board: 3/4, top and the four cardinal directions. Below are additional angles, 3D scenes and variants.
- Right — the agent and the profile. The Locations assistant chat and the location profile, with the Prompt / Assistant switch between them.
01Create a location with the agent#
Open the Locations section. The section’s agent is the Locations assistant: it reads the script and fills in the place’s profile.
Ask the assistant#
Click the Create a location or Extract from script suggestion below the chat — or write in your own words. In the project «ЧП в пионерском лагере» all the places came from a single request:
Create the locations from the script with profiles
The agent creates locations with the INT or EXT type and a profile — nine places from the script in this project. A follow-up request can make the profiles more detailed. The agent does not generate images. You start those yourself — with the buttons on the card or by asking in the chat, for example “generate the cardinal directions”.
Or create one manually#
Add location on the top bar opens the “New location” window — it has only a name. Fill in the profile yourself later or ask the agent.
Check the profile#
Open the profile with the Prompt / Assistant switch below the chat. It is the text foundation of every generation of the location.
| Label | What it holds |
|---|---|
| Description | What is in the place: buildings, objects, paths, plants |
| Mood / atmosphere | The feel of the scene — also the card’s subtitle |
| Visual traits | Materials, colors, light — what the model keeps in every view |
| Type | INT (interior), EXT (exterior) or INT/EXT — at the bottom of the profile |
Important
The agent writes the profile strictly from the script. If a place is not in the text, it will not invent it — add the scene to the script first or describe the location yourself.
02Generate the 3/4 view#
On the view board, click Generate 3/4. The 3/4 view is the location’s base frame: the camera at eye level at a 30–45° angle, with several planes of depth visible. All other views are built from it.
Above the view are action icons: , , , . On the right — , , and .
03Generate the cardinal directions and top view#
Each view is built from the ones already made, so the order matters. Until its base exists, a button is disabled and hints at what is missing.
- Generate North — from the 3/4 view.
- Generate Top view — from 3/4 or north: a plan of the place where the ground fills most of the frame.
- Generate West and Generate East — from north with the camera turned 90°; the top view tells what stands by each wall.
- Generate South — from west and east.
Why
If you generate each view separately from text, you get six different camps: the buildings, flagpole and sports ground end up anywhere. The chain “3/4 → north → top → west and east → south” hands each next view the space already drawn, and all six frames stay the same place. That is why the cardinal directions can later be assembled into a 3D room.
04Fix a detail with an outline#
An extra object is easier to remove than to regenerate the whole view. On the left of the 3/4 view is a slogan board — let’s remove it.
- Click on the 3/4 view — the editor opens.
- Choose , then the oval, and circle the board.
- In the “Correction” panel, click the Remove the circled object suggestion.
- Click to the right of the field.

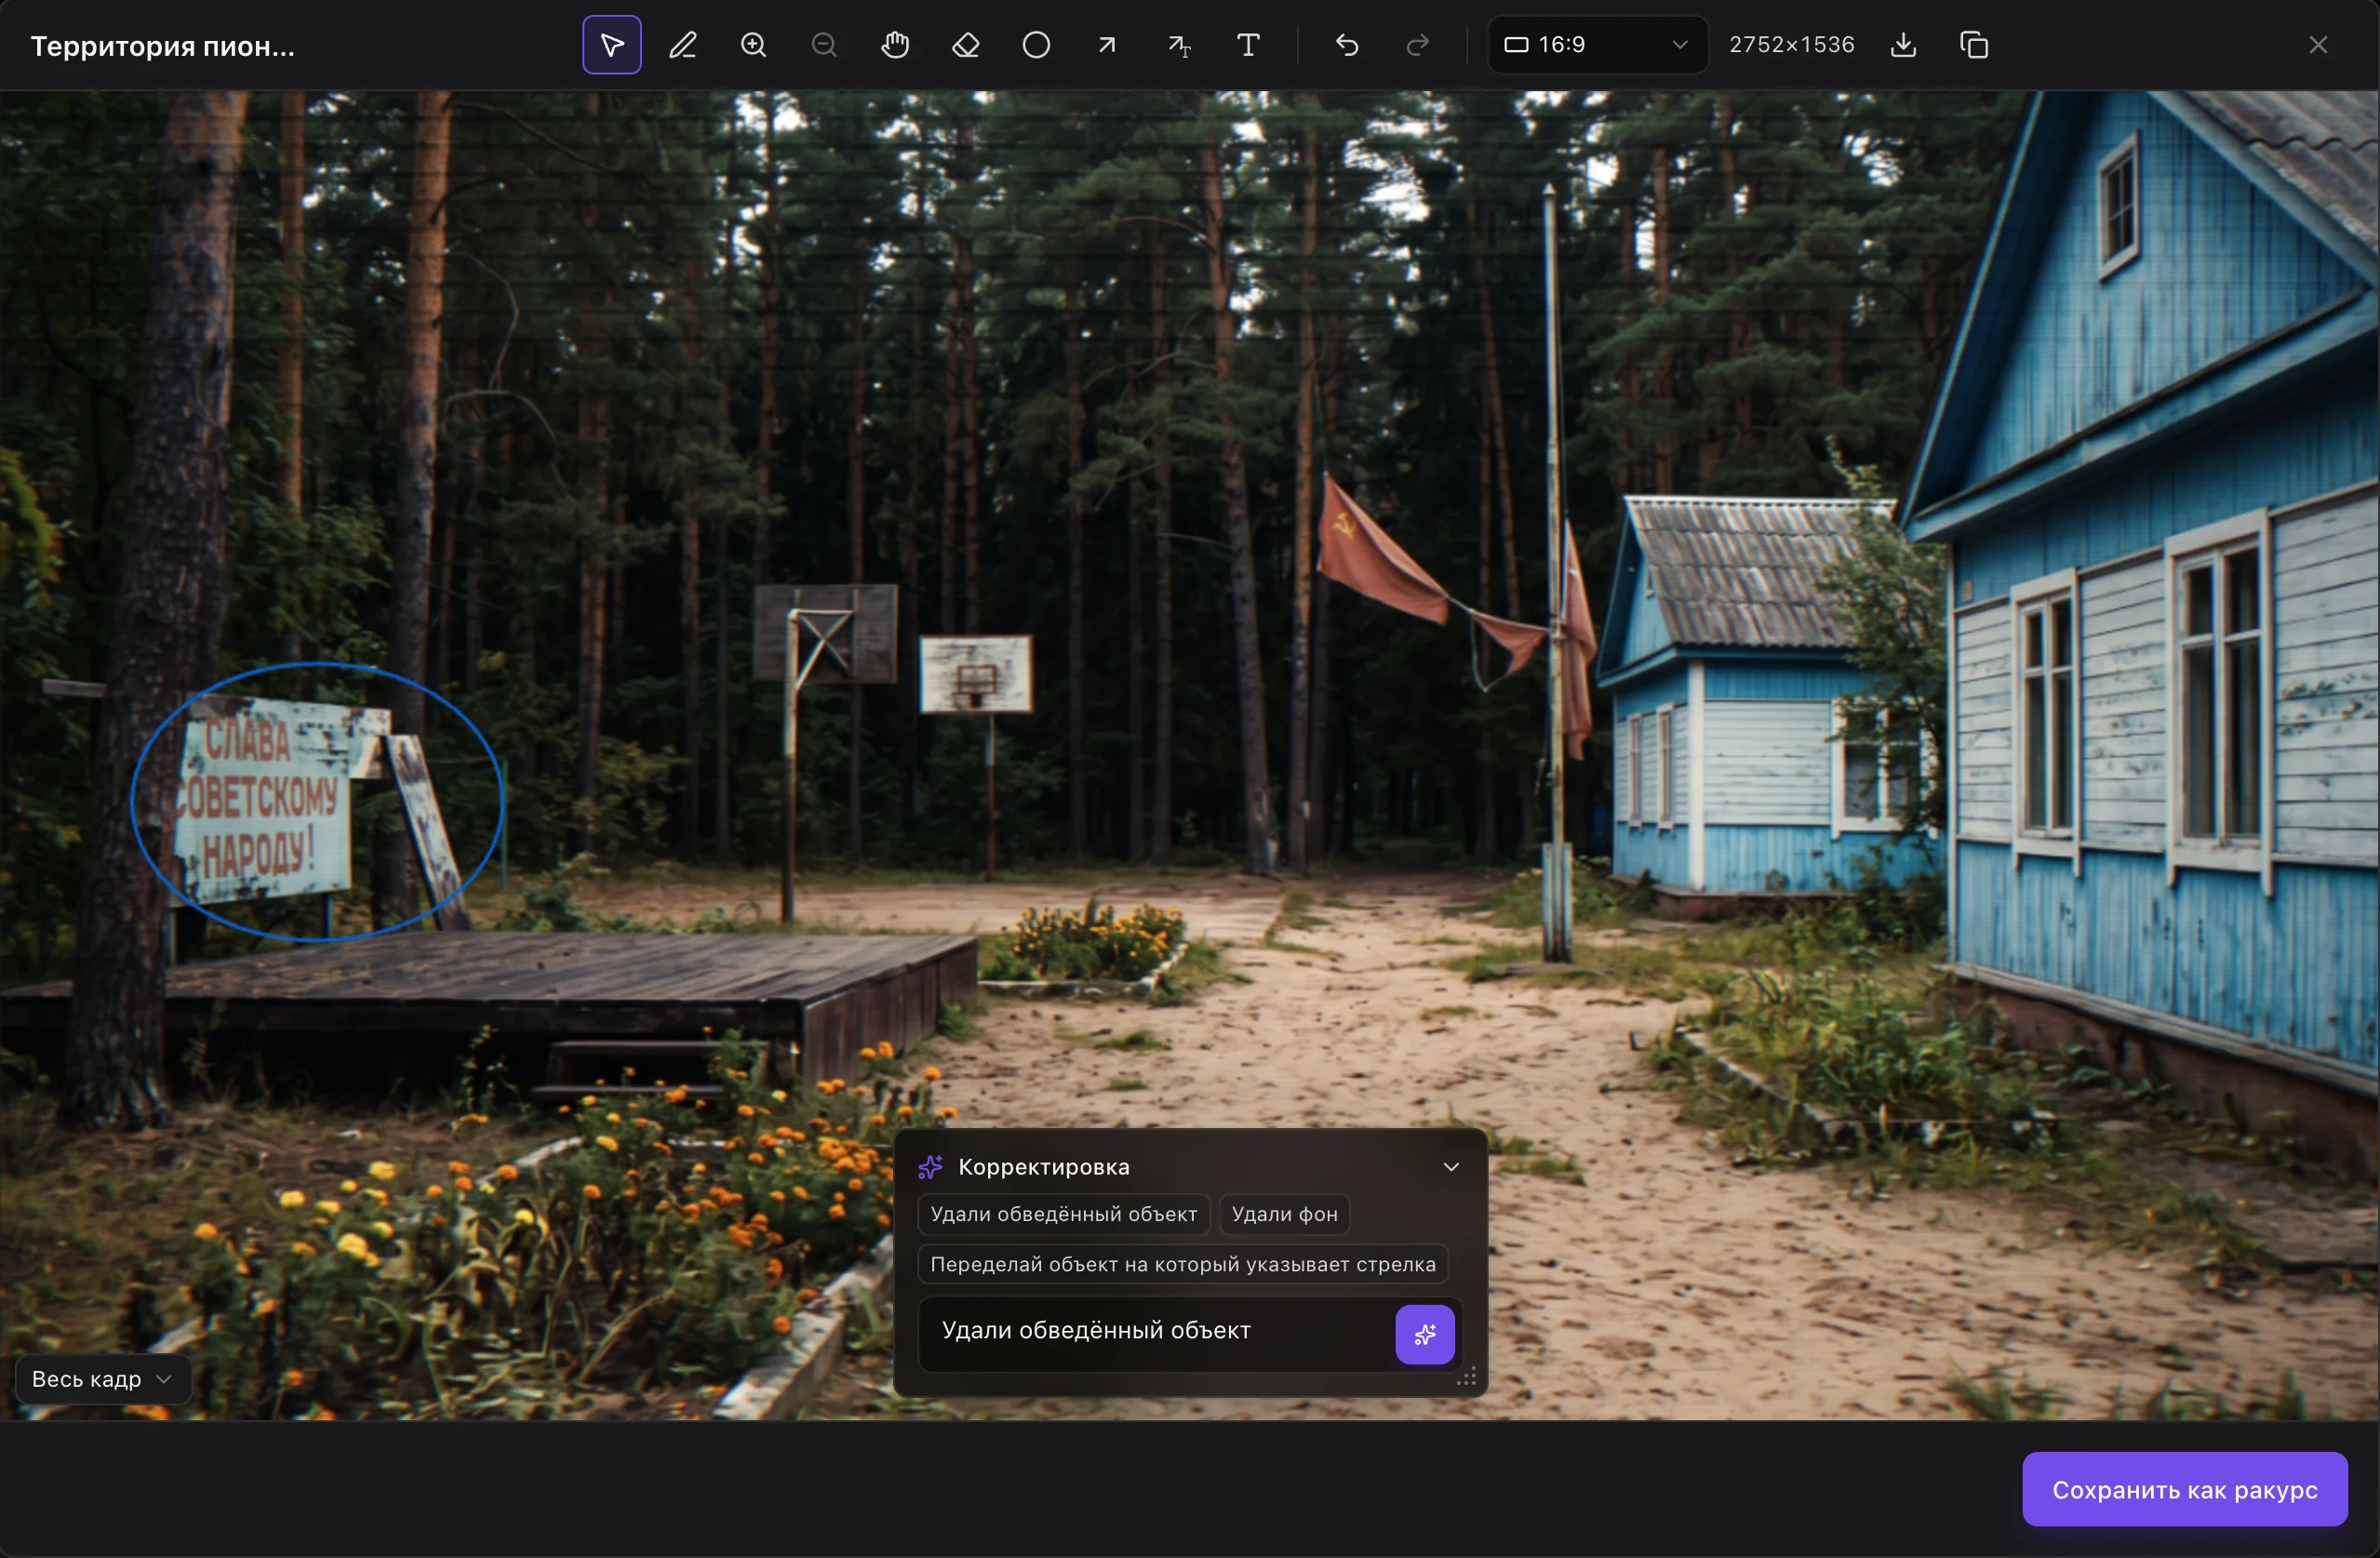
The corrected view is saved as a new version; earlier ones stay in .
Tip
A correction changes only this view. If the object is visible in other cardinal directions too, fix them the same way or regenerate them.
05View the location in 3D#
Click on the 3/4 view. The 3D room opens: the cardinal directions are stretched over the walls of a cube, and you stand inside.
- Look around. Left mouse button to look, WASD or arrows to move, Shift for speed, R and F for height, the wheel to zoom. The “Center”, “NW corner”, “SE corner” buttons move the camera.
- Shape. “Cube”, “Cylinder” or “Sphere” — the switch in the top right corner, next to a map with the camera position.
- Empty walls. A wall without an image has a button to generate that side.
- Your own angle. Find a frame and click Create viewpoint — it is saved to “Additional angles” below the view board, and you can pick it in a shot.
Below the view board are this location’s “Additional angles” and “3D Scenes”: scenes from the “3D Scenes” section linked to it, with their previz.
06Add a variant (time / weather)#
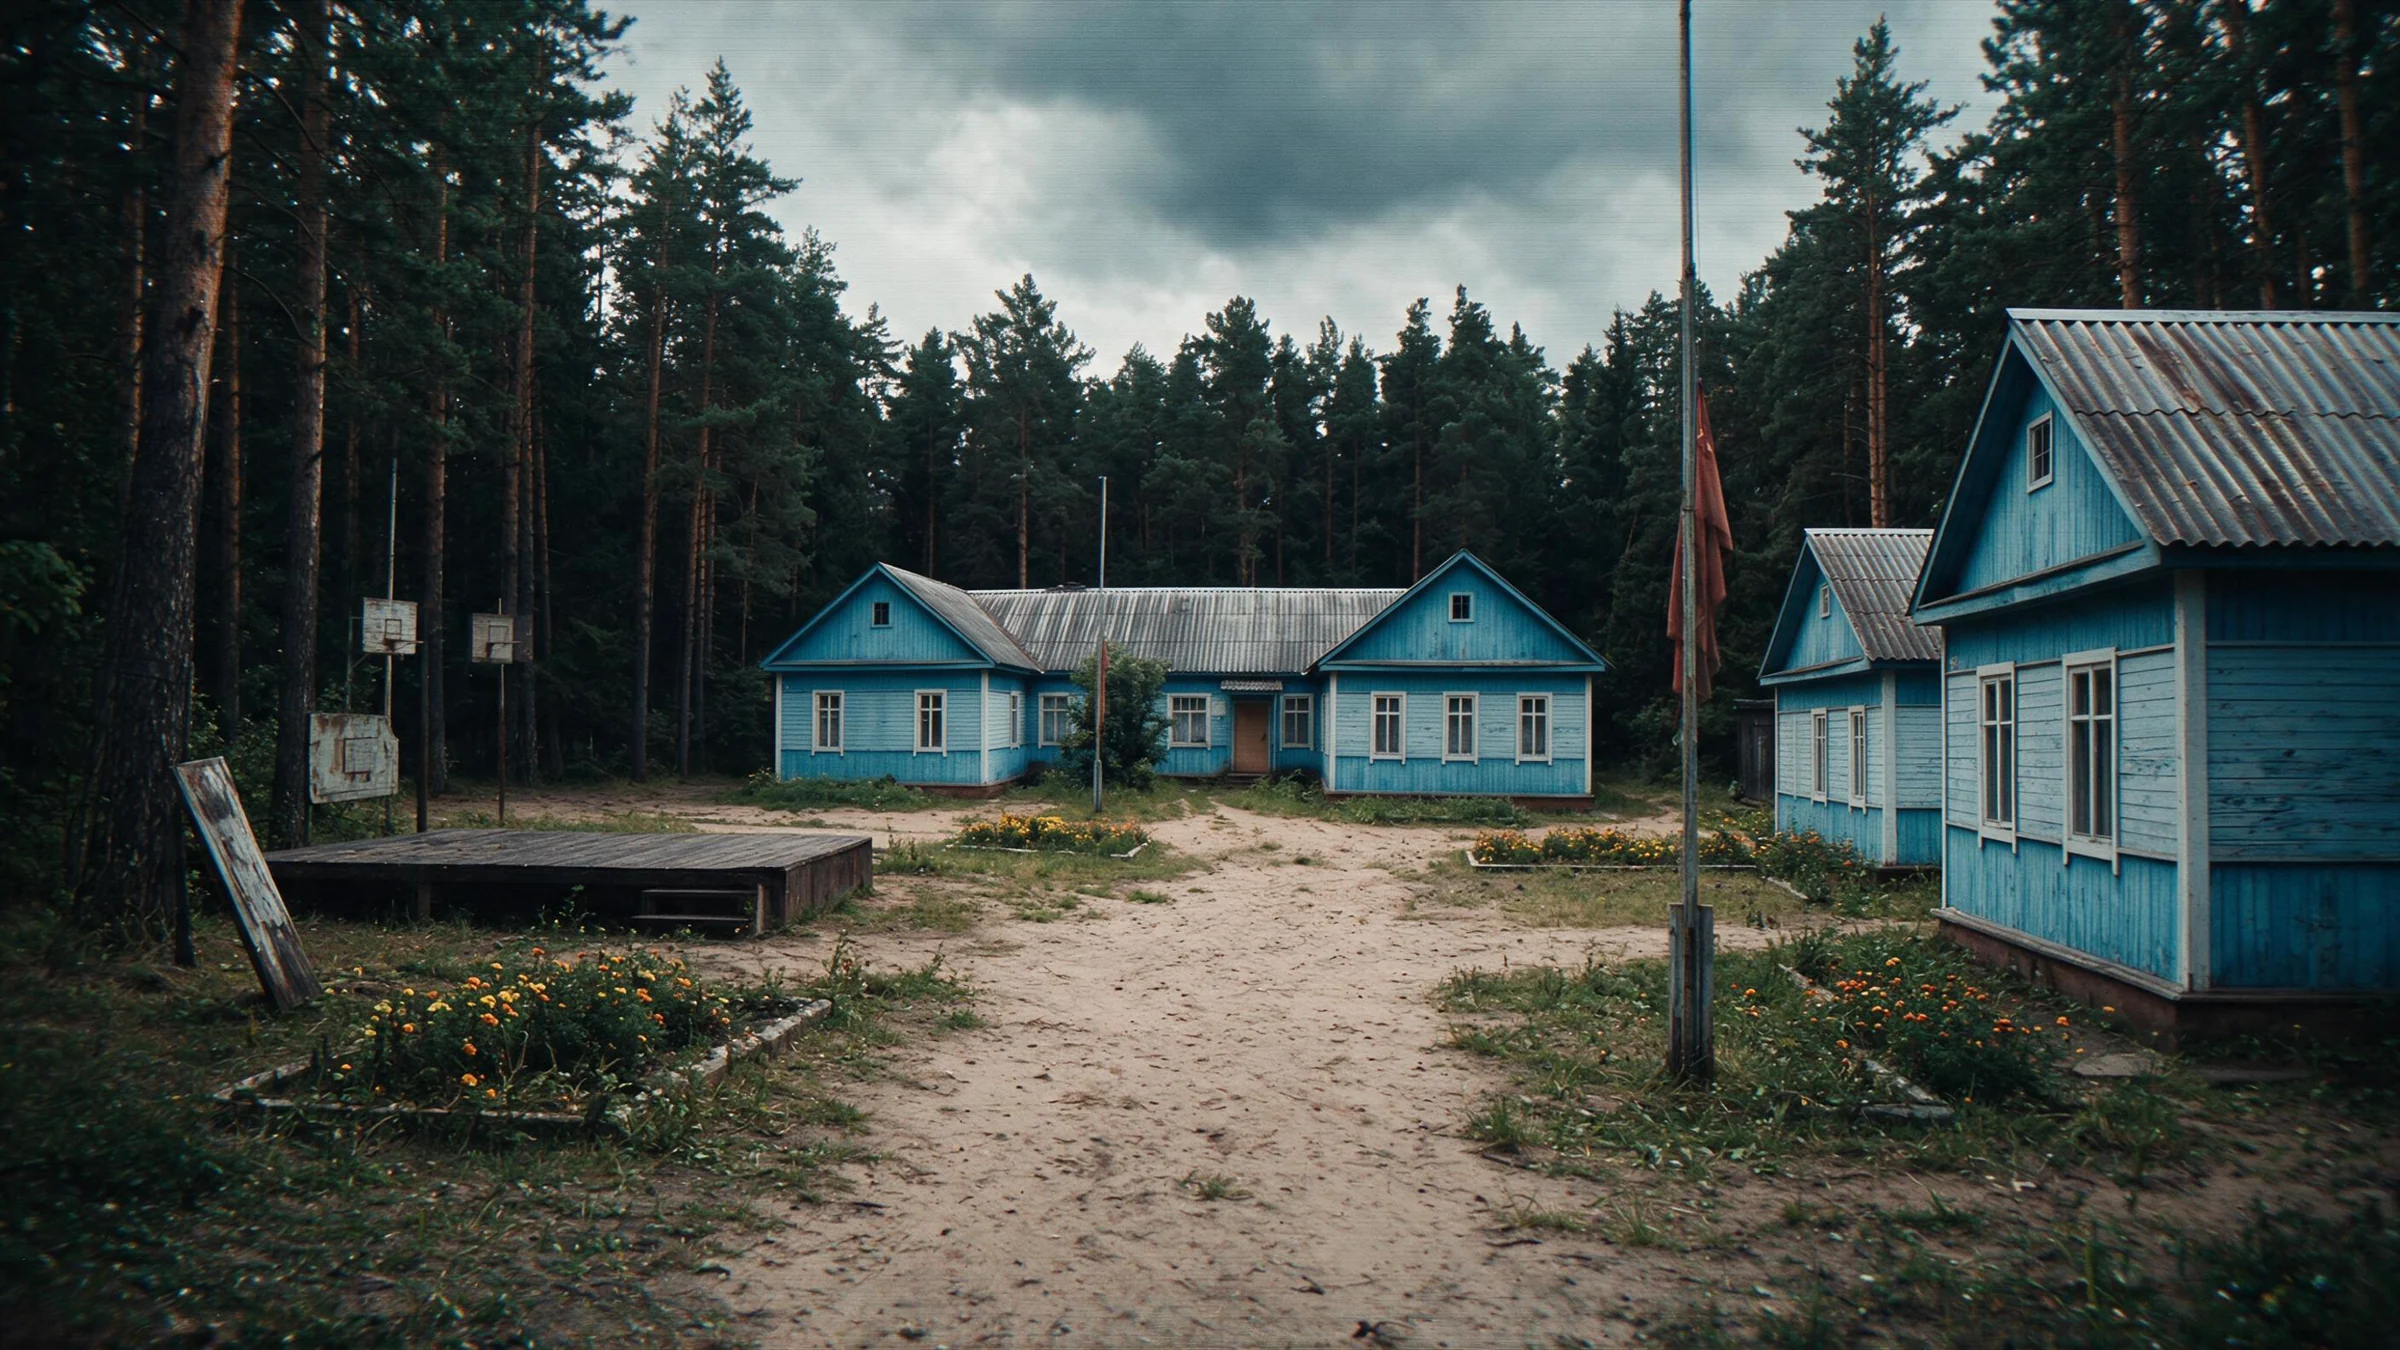
A variant is the same location at another time of day or in other weather. We will make two: night with fog and winter.
In the “Variants (time / weather)” block at the bottom of the card, click Add variant and fill in “Time of day”, “Weather” and, if you like, “Notes” — they go into the prompt. The name is filled in automatically.
“Source image preservation” sets the model’s freedom: 1.0 changes only the light, 0.0 allows a new angle and scale. By default the value comes from the project settings.
Click Generate — the platform creates the variant right away and generates its 3/4 view from the base location. Compare it with the base “South” view — the frame is the same, the time of day and weather have changed:

Second variant: winter#
Let’s add one more variant — a winter day. To keep the model’s changes to a minimum, move “Source image preservation” almost all the way, to 0.95.

Each variant has its own angles: 3/4, top and the cardinal directions are generated the same way as for the base.
Important
A variant needs the base 3/4 view. Without it variant generation is unavailable.
07Pick the location in a shot#
In a shot, open the panel. Check the location, pick a variant under it — the base one (shown as «Базовая») or “night / fog” — and below that an angle: one of the basic views or an additional angle from 3D.
The location goes into generation as the environment: place, light and atmosphere. The model does not take characters from it. The variant’s time of day and weather are added to the prompt.
What’s next#
Record a previz: place the characters in the location’s 3D scene and fly the camera through — the fly-through goes into the shot as a motion reference. How to do it — see the “3D Scenes” guide.
Updated October 18, 2026