Props
A prop is an object with a front view and a layout from every side. A detail is changed with an outline correction, and states show the same object opened, broken or switched on; the diagonal size sets its scale among other objects.
On this page
What you will get#
- Profile
- Front view
- Layout
- Correction
- States
- Scale
- In a shot
- Needs
- A project with a script
- Section
- Props
- Generations
- Correction, layout, two states
How the Props section works#
- Left — the project menu. “Props” sits in the “Assets” group.
- Top — the project’s objects. A strip of previews; the top bar has Add prop and Scale.
- Center — the prop card. Name, category and number of shots, references, “Front view” and “Layout”; below them, “States”.
- Right — the agent and the profile. The Props assistant chat and the prop profile, with the Prompt / Assistant switch between them.
01Create props with the agent#
Open the Props section. The section’s agent is the Props assistant: it reads the script and fills in the prop profiles.
Ask the assistant#
Click the Create a prop suggestion below the chat or write in your own words:
Extract the props from the script and fill in their profiles
The agent creates objects and profiles from the script but does not generate images. You start those yourself — with the buttons on the card or by asking in the chat.
Or create one manually#
Add prop on the top bar opens the “New prop” window — it has only a name. The platform creates the rest of the profile as an empty template and sets the diagonal size to 30 cm — correct it.
Check the profile#
Open the profile with the Prompt / Assistant switch below the chat. It is the text foundation of every generation of the object.
| Label | What it holds |
|---|---|
| Diagonal size | The object’s size in centimeters — used in generations, more in the “Scale” step |
| Category | The object type — shown under the card’s name |
| Visual description | Shape, materials, details — what the model keeps in every frame |
| Purpose, Features | Where and how the object works in scenes |
| Consistency notes | What must not change between frames: label, pattern, color |
02Generate the front view and layout#
The card has two slots:
- “Front view” — a single 3:4 frame on a gray background. Generated from the profile and references.
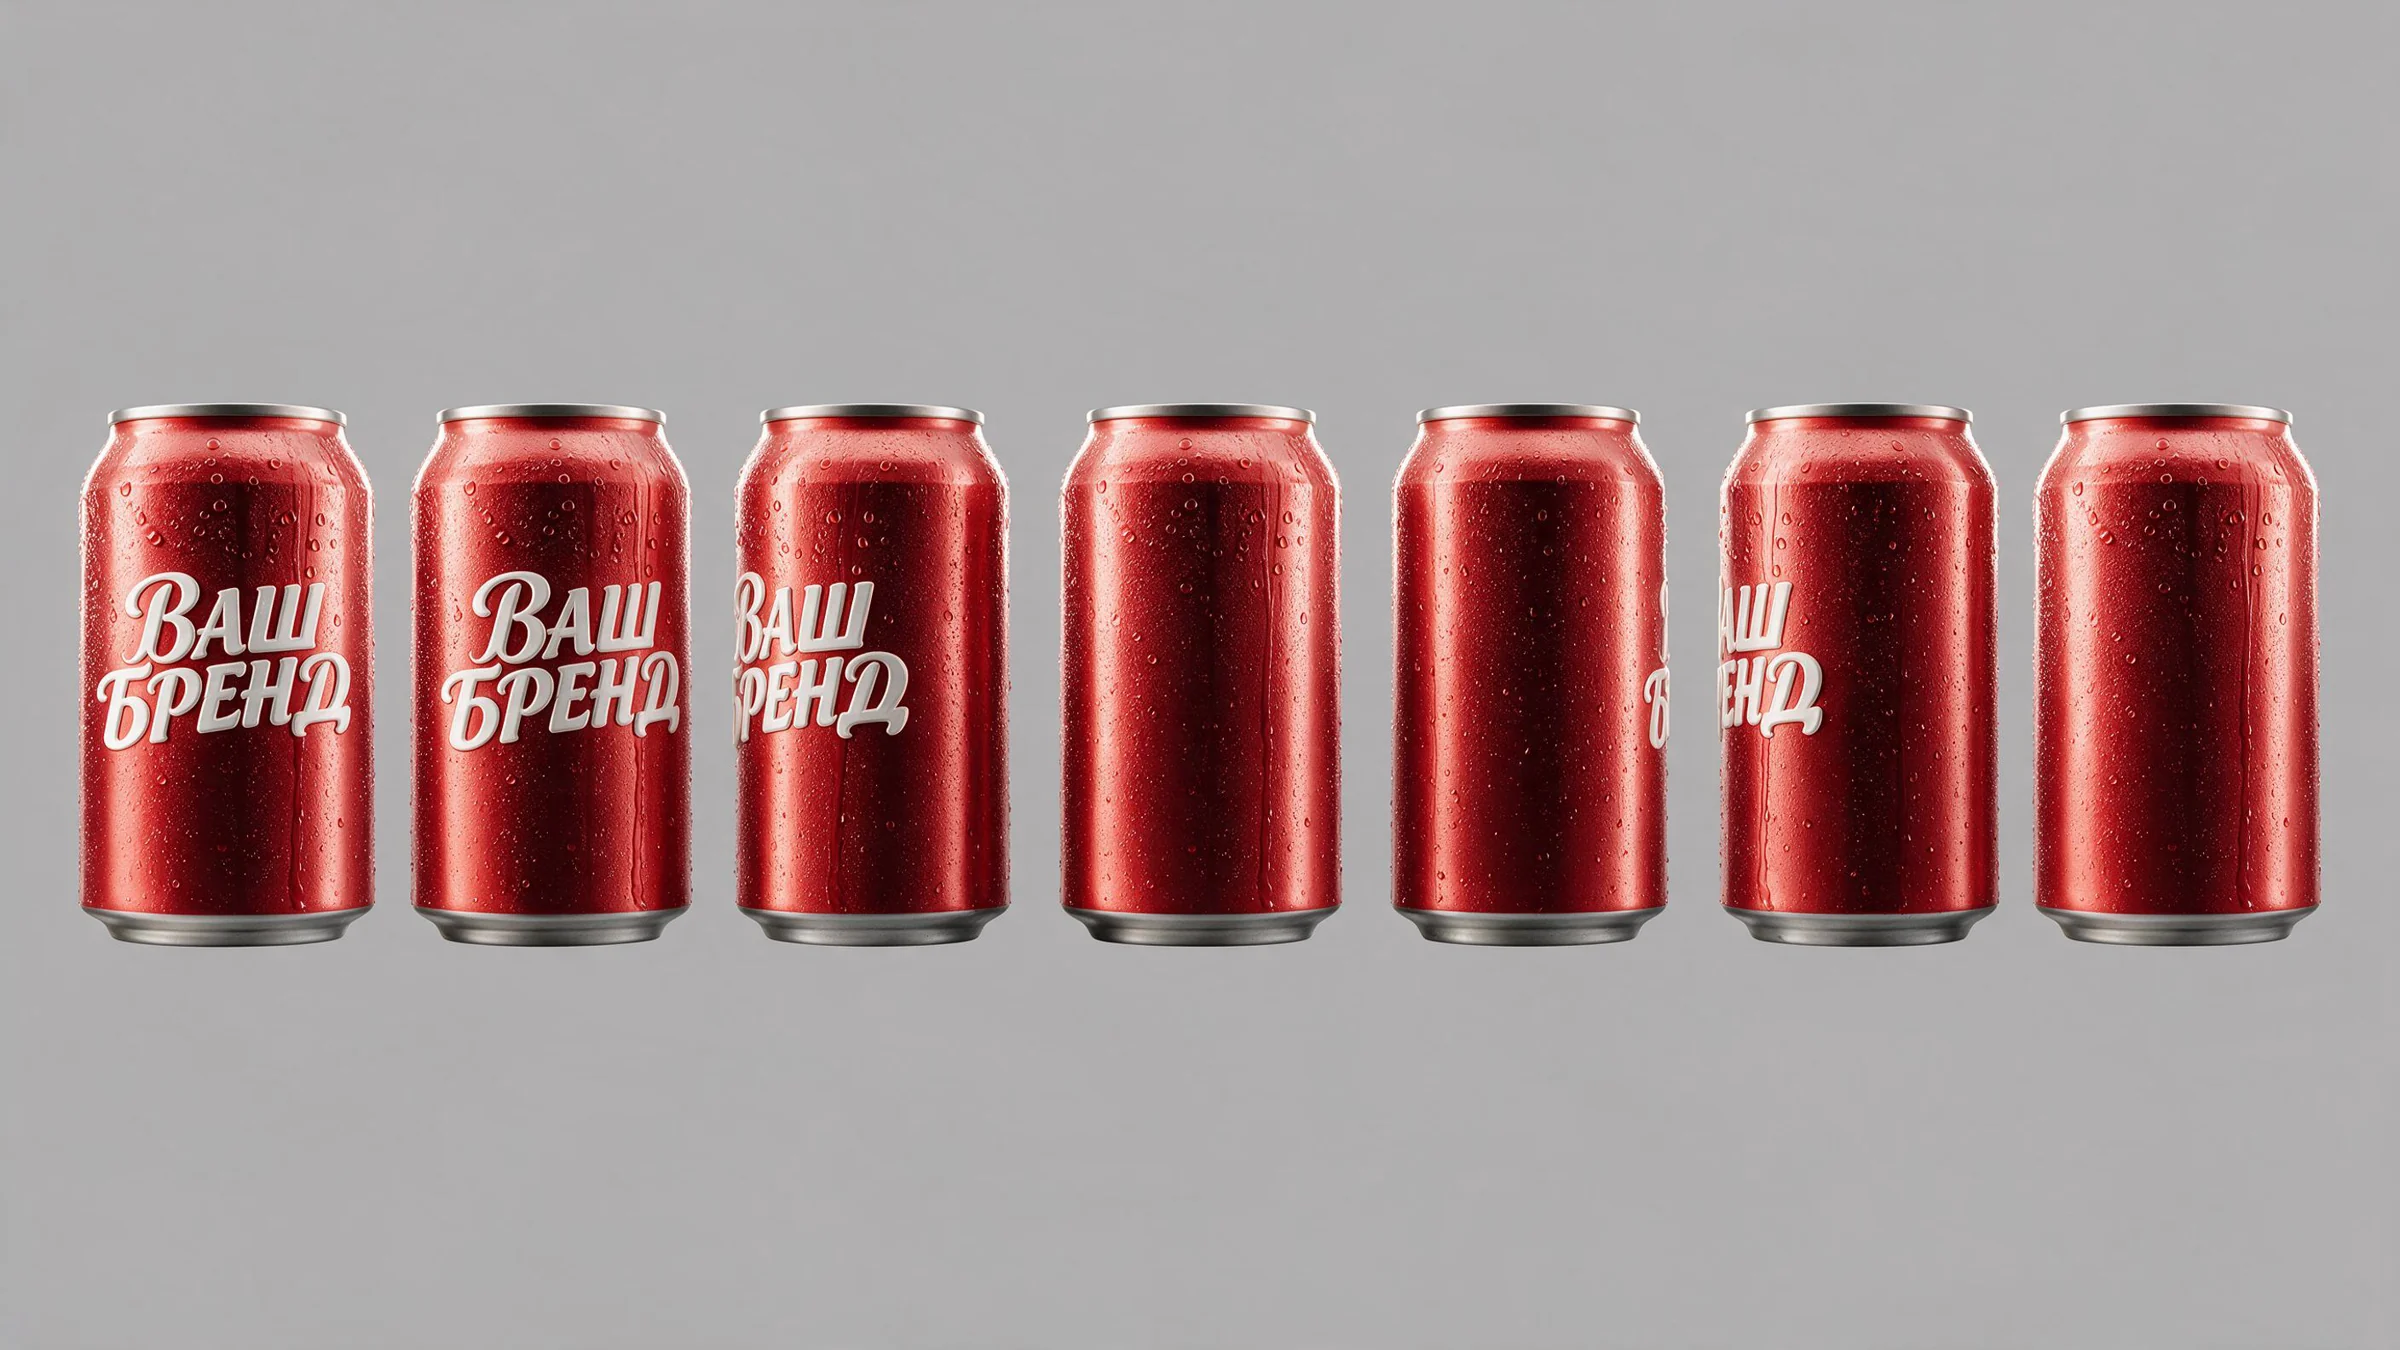
- “Layout” — a 16:9 sheet with the object from every side: front, 3/4, profiles, back. If there is already a front view, the layout is built from it.
Click Generate in each slot — the front view first, then the layout.
Above the slots are action icons: , , , . On the right — , and .
Why
The front view is the object’s base frame: the label and shape show best on it. A layout built from it carries these details to every side, so the object looks the same from any angle.
03Replace the label with an outline#
The can has a placeholder label, «Ваш бренд» (Your brand). Let’s replace it with Frameriver without touching anything else.
- Click on the front view — the editor opens.
- Choose , then the oval, and circle the label.
- In the “Describe the edit…” field, write what to do: “Replace the circled label with “Frameriver” in the same font and color”.
- Click to the right of the field.

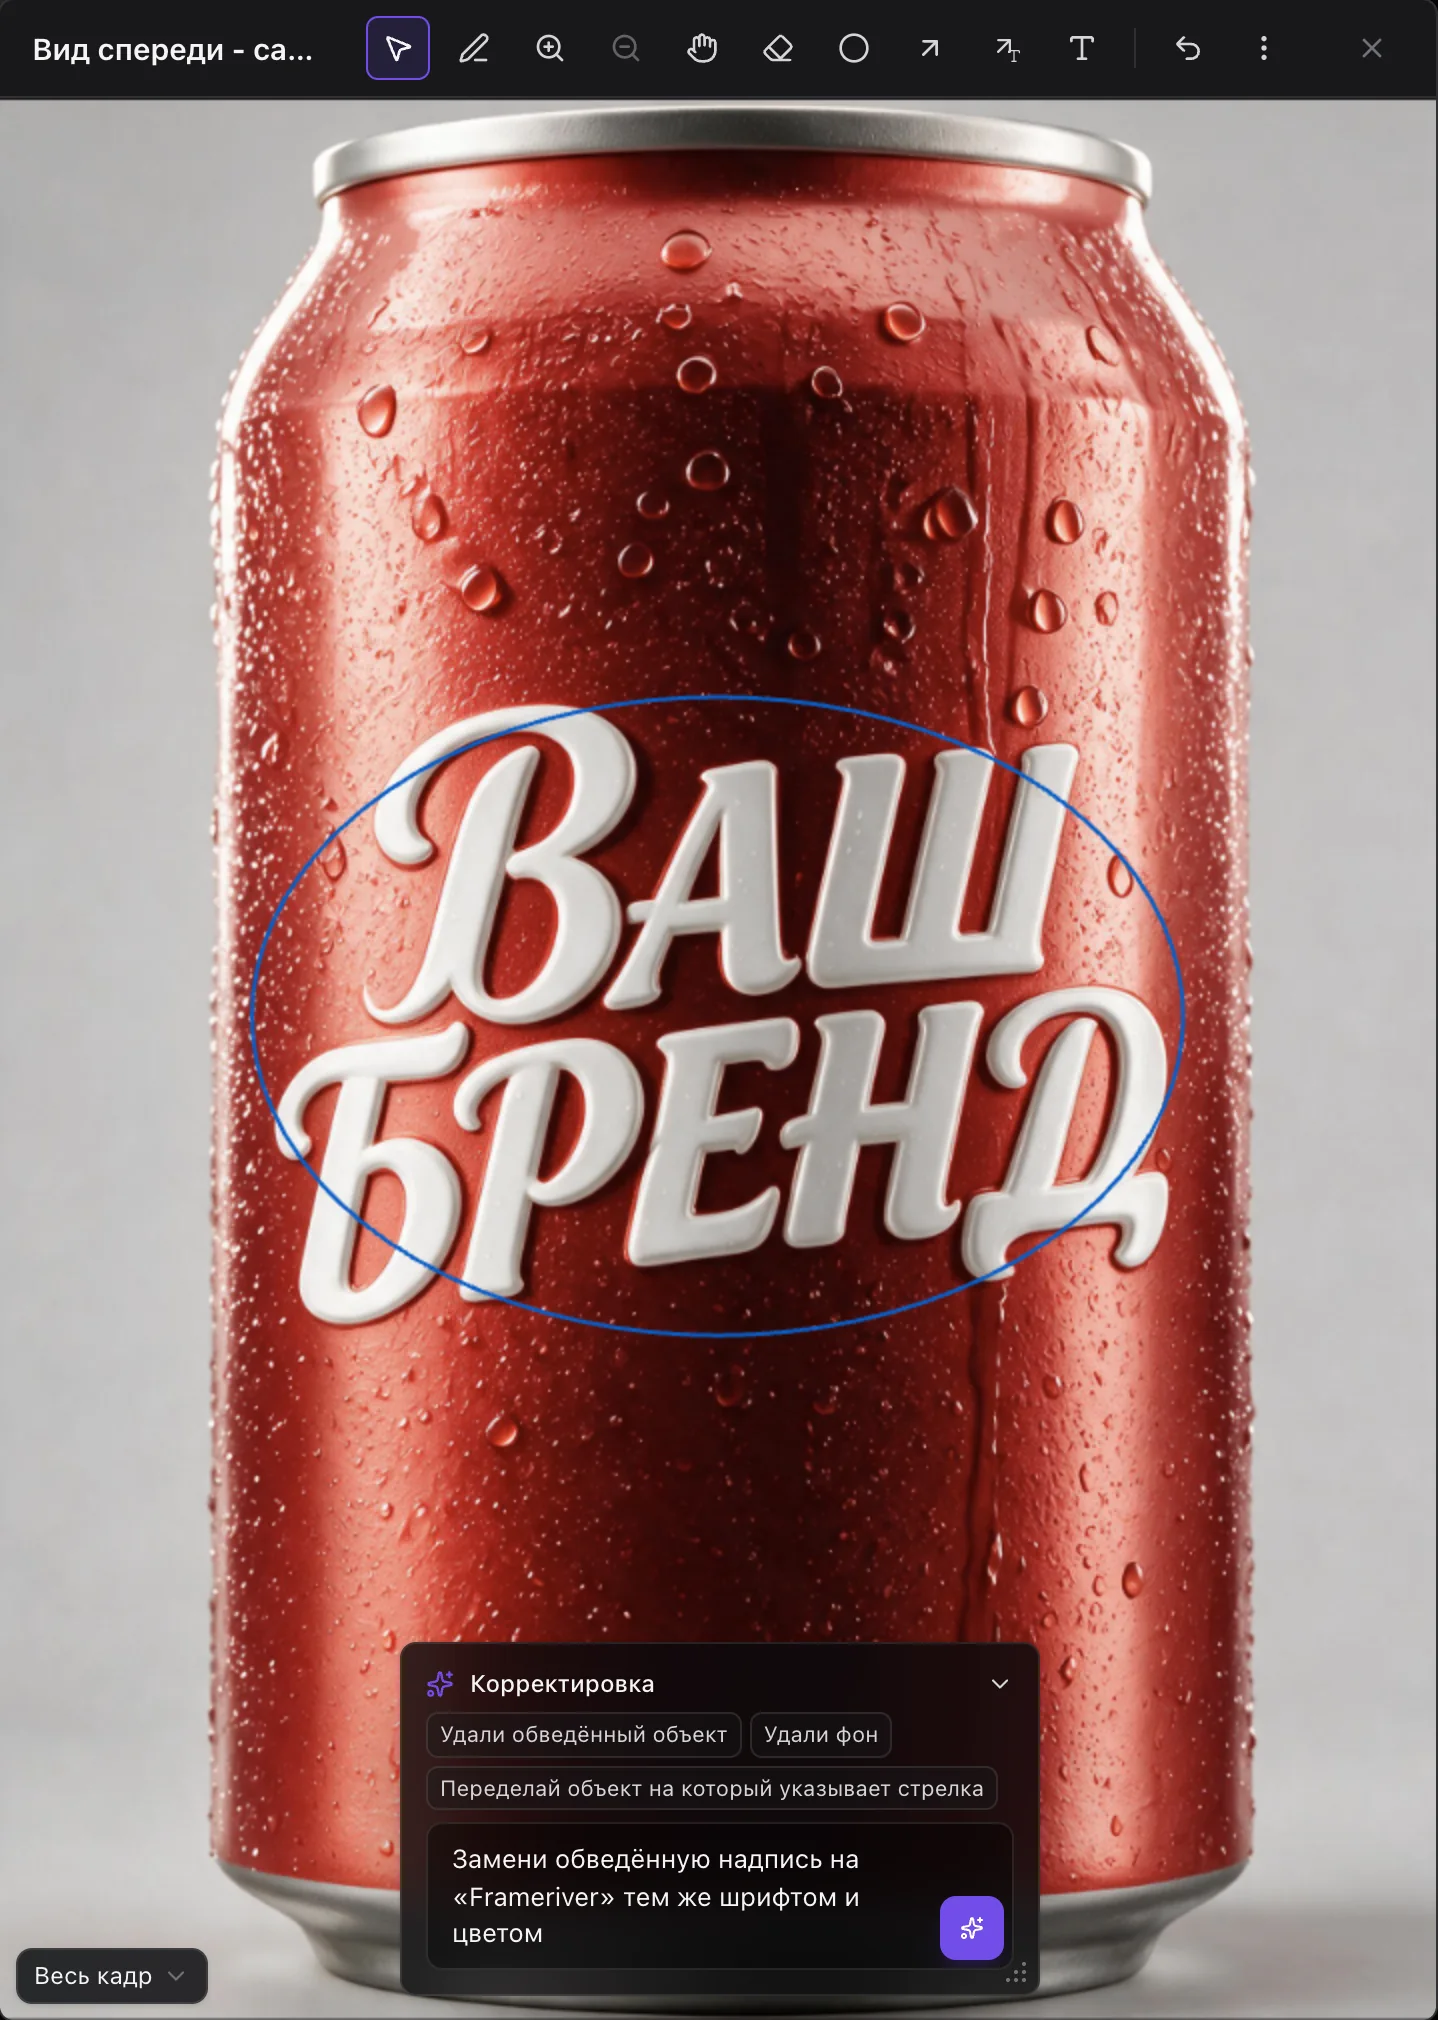
The drops, highlights and font stayed the same — only the text changed. The corrected view is saved as a new version.
Update the layout#
A correction changes only the slot where you made it. Click on the layout — it is rebuilt from the new front view, and the Frameriver label appears on every side.

04Add states#
A state is the same object in another condition: opened, broken, dirty, switched on. We will give the can two: “Opened” and “Crushed” (we named them in Russian, so the screenshots show «Открытая» and «Смятая»).
In the “States” block, click Add state. The “New state” window has two fields: the name and a description of what changes. The description goes into the prompt.
Click Generate — the platform creates the state right away and generates its layout from the base one. Add the second state the same way without waiting for the first.
Why
A state is generated from the base layout with a strict rule: shape, proportions, materials and label are kept, and only the described state changes. That is why the crushed can stays the same Frameriver can rather than a random red can.
Important
A state needs the base layout. Without it state generation is unavailable.
05Set the scale#
The diagonal size from the profile sets the object’s size relative to the others. Click Scale on the top bar — in the “Prop scale sheet” window all the project’s objects stand on one line by their front views.
Hover over an object to change its size in the field next to it, and click “Apply all”. If an object has no front view, it will not be on the sheet.
Tip
When a 10-meter frigate stands next to a 13-centimeter can, the can turns into a dot on the sheet. Scale matters for objects that appear in the same frame — compare them with each other.
06Pick the prop and its state in a shot#
In a shot, open the panel and check the object. A state picker appears under it: “Base state”, “Opened” or “Crushed”.
The object goes into generation as a reference: shape, materials and size. If the selected state has no image yet, the base layout goes into generation.
The “Consider scale” checkbox in the video settings attaches a scale sheet. If the shot has both characters and props with a size, the sheet is shared — characters and props on one ruler.
What’s next#
Check the object in the shots that need it and pick a state for each scene: the can intact on the table, opened in a hand, crushed after a blow.
Updated October 18, 2026